This article will show you how to disconnect the internal speaker on Dell desktop computers. Some models may have slightly different features. Pictured in here is a Dell Precision 3450. If yours is too different, please call the Marmot Help Desk for assistance.
You can also reverse the process in order to disconnect the speaker.
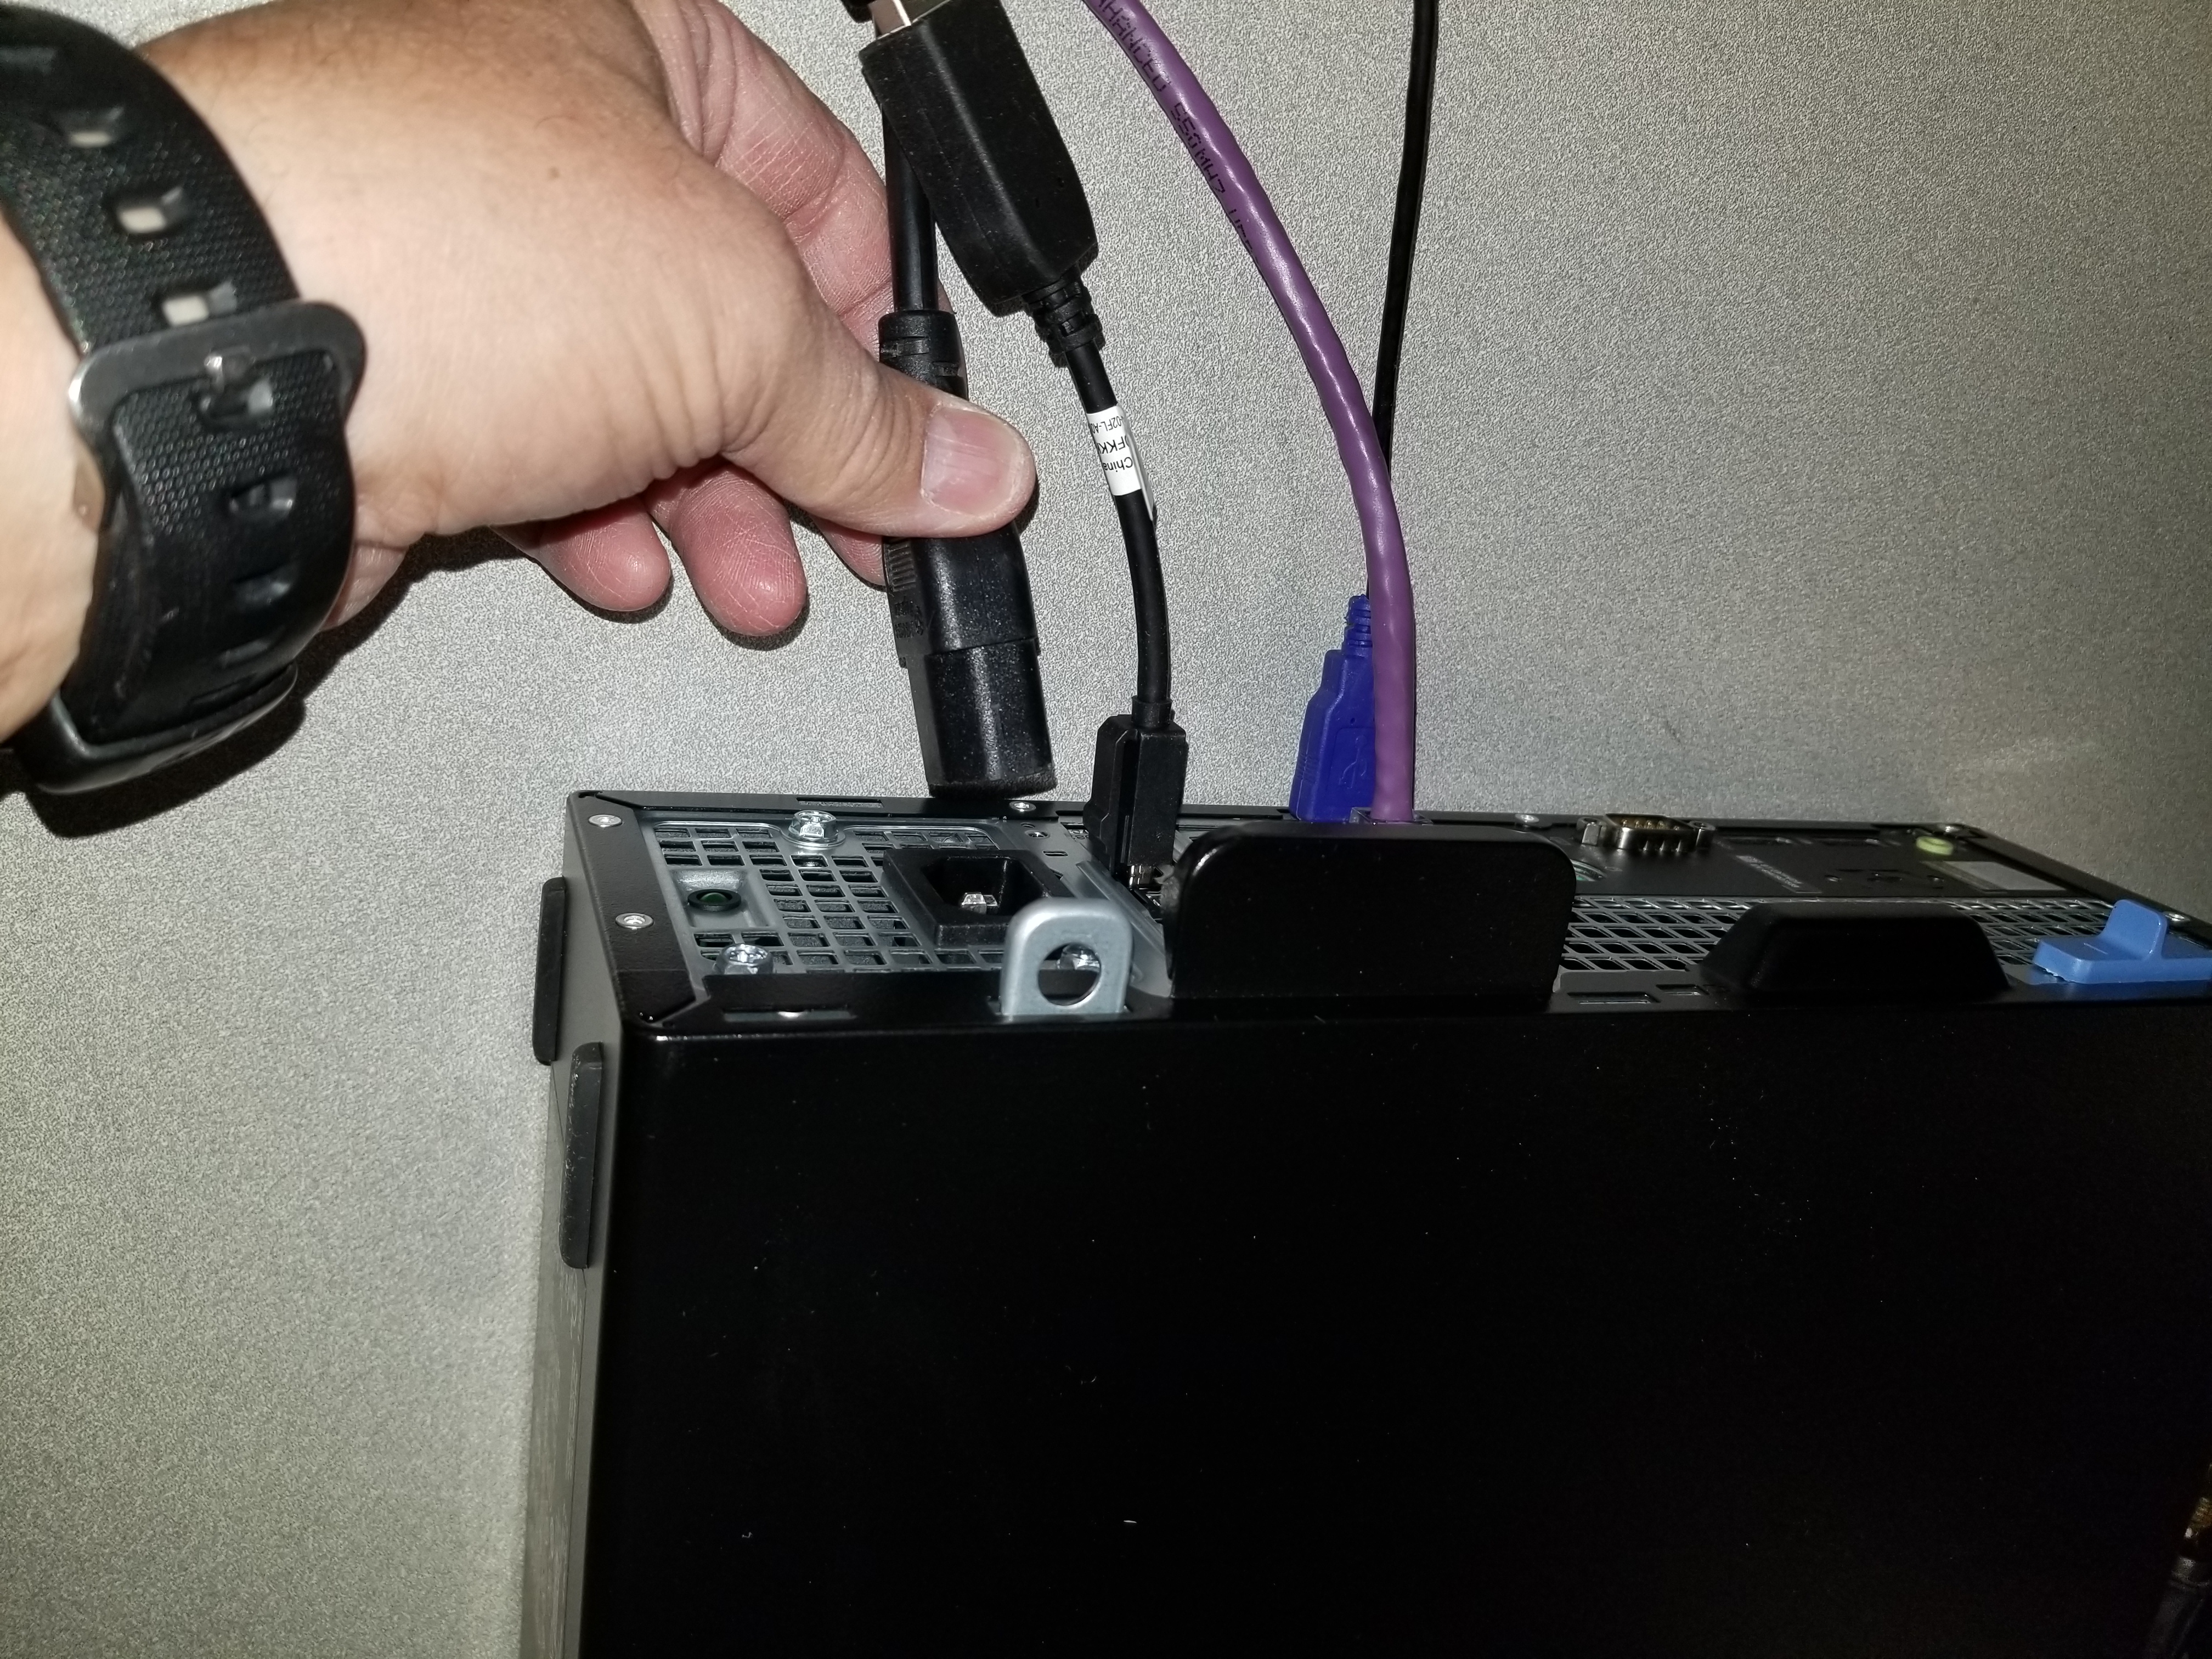
NOTE: Be sure to turn off the computer and disconnect the powers cable from the back of the computer before you begin
\uD83D\uDCD8 Instructions
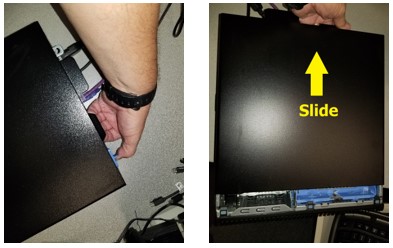
Open the case, using the blue latch at the rear of the computer. Latch slides toward center
of computer, door slides toward the back & then lifts away.
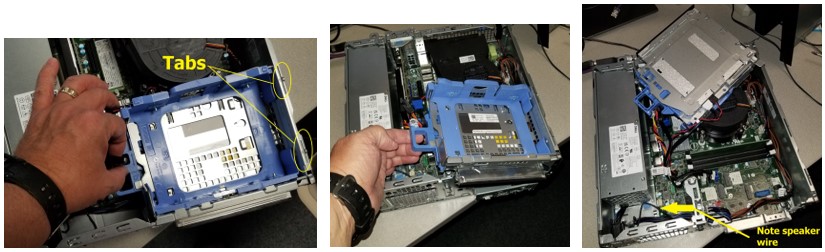
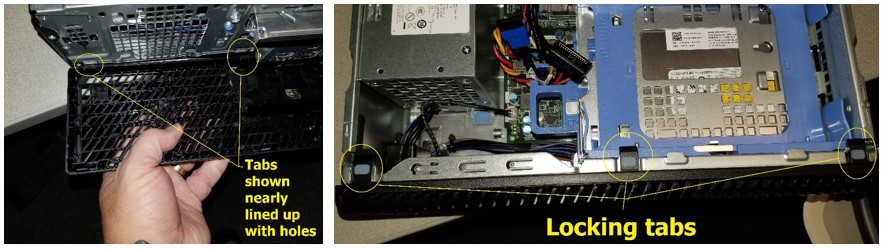
With the front of the machine facing you, locate the 3 locking tabs which hold the face of the computer on. Gently lift each to release them, then lower the face away from the frame and pull it away. Set it aside for later reinstallation.

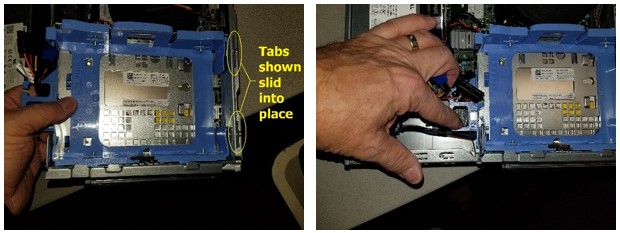
Next, find and unlock the latch for the drive cage as shown. When locked, the latch will show a locked padlock icon. When unlocked, it will show an open padlock. Once you’ve unlocked it, lever it up out of the frame, pivoting on the tabs shown in the first pic below. Once the tabs are free of the frame, lay the drive cage back over the top of the processor fan as shown in the 3rd pic.
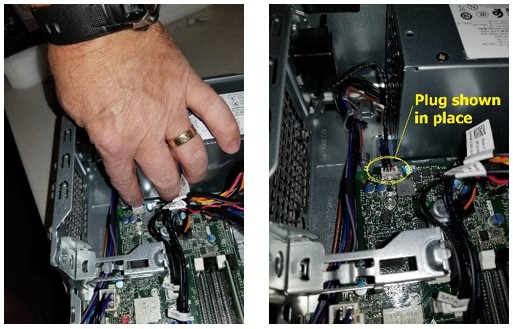
Locate the plug, attached to the speaker wire pointed out in the 3rd picture in the last step. The plug is white and the cable is usually several smaller cables wrapped in black as shown. Note the projections on one side of the plug, they go into the notch on one side of the jack (typically facing away from the power supply - silver box below my hand in the image below).
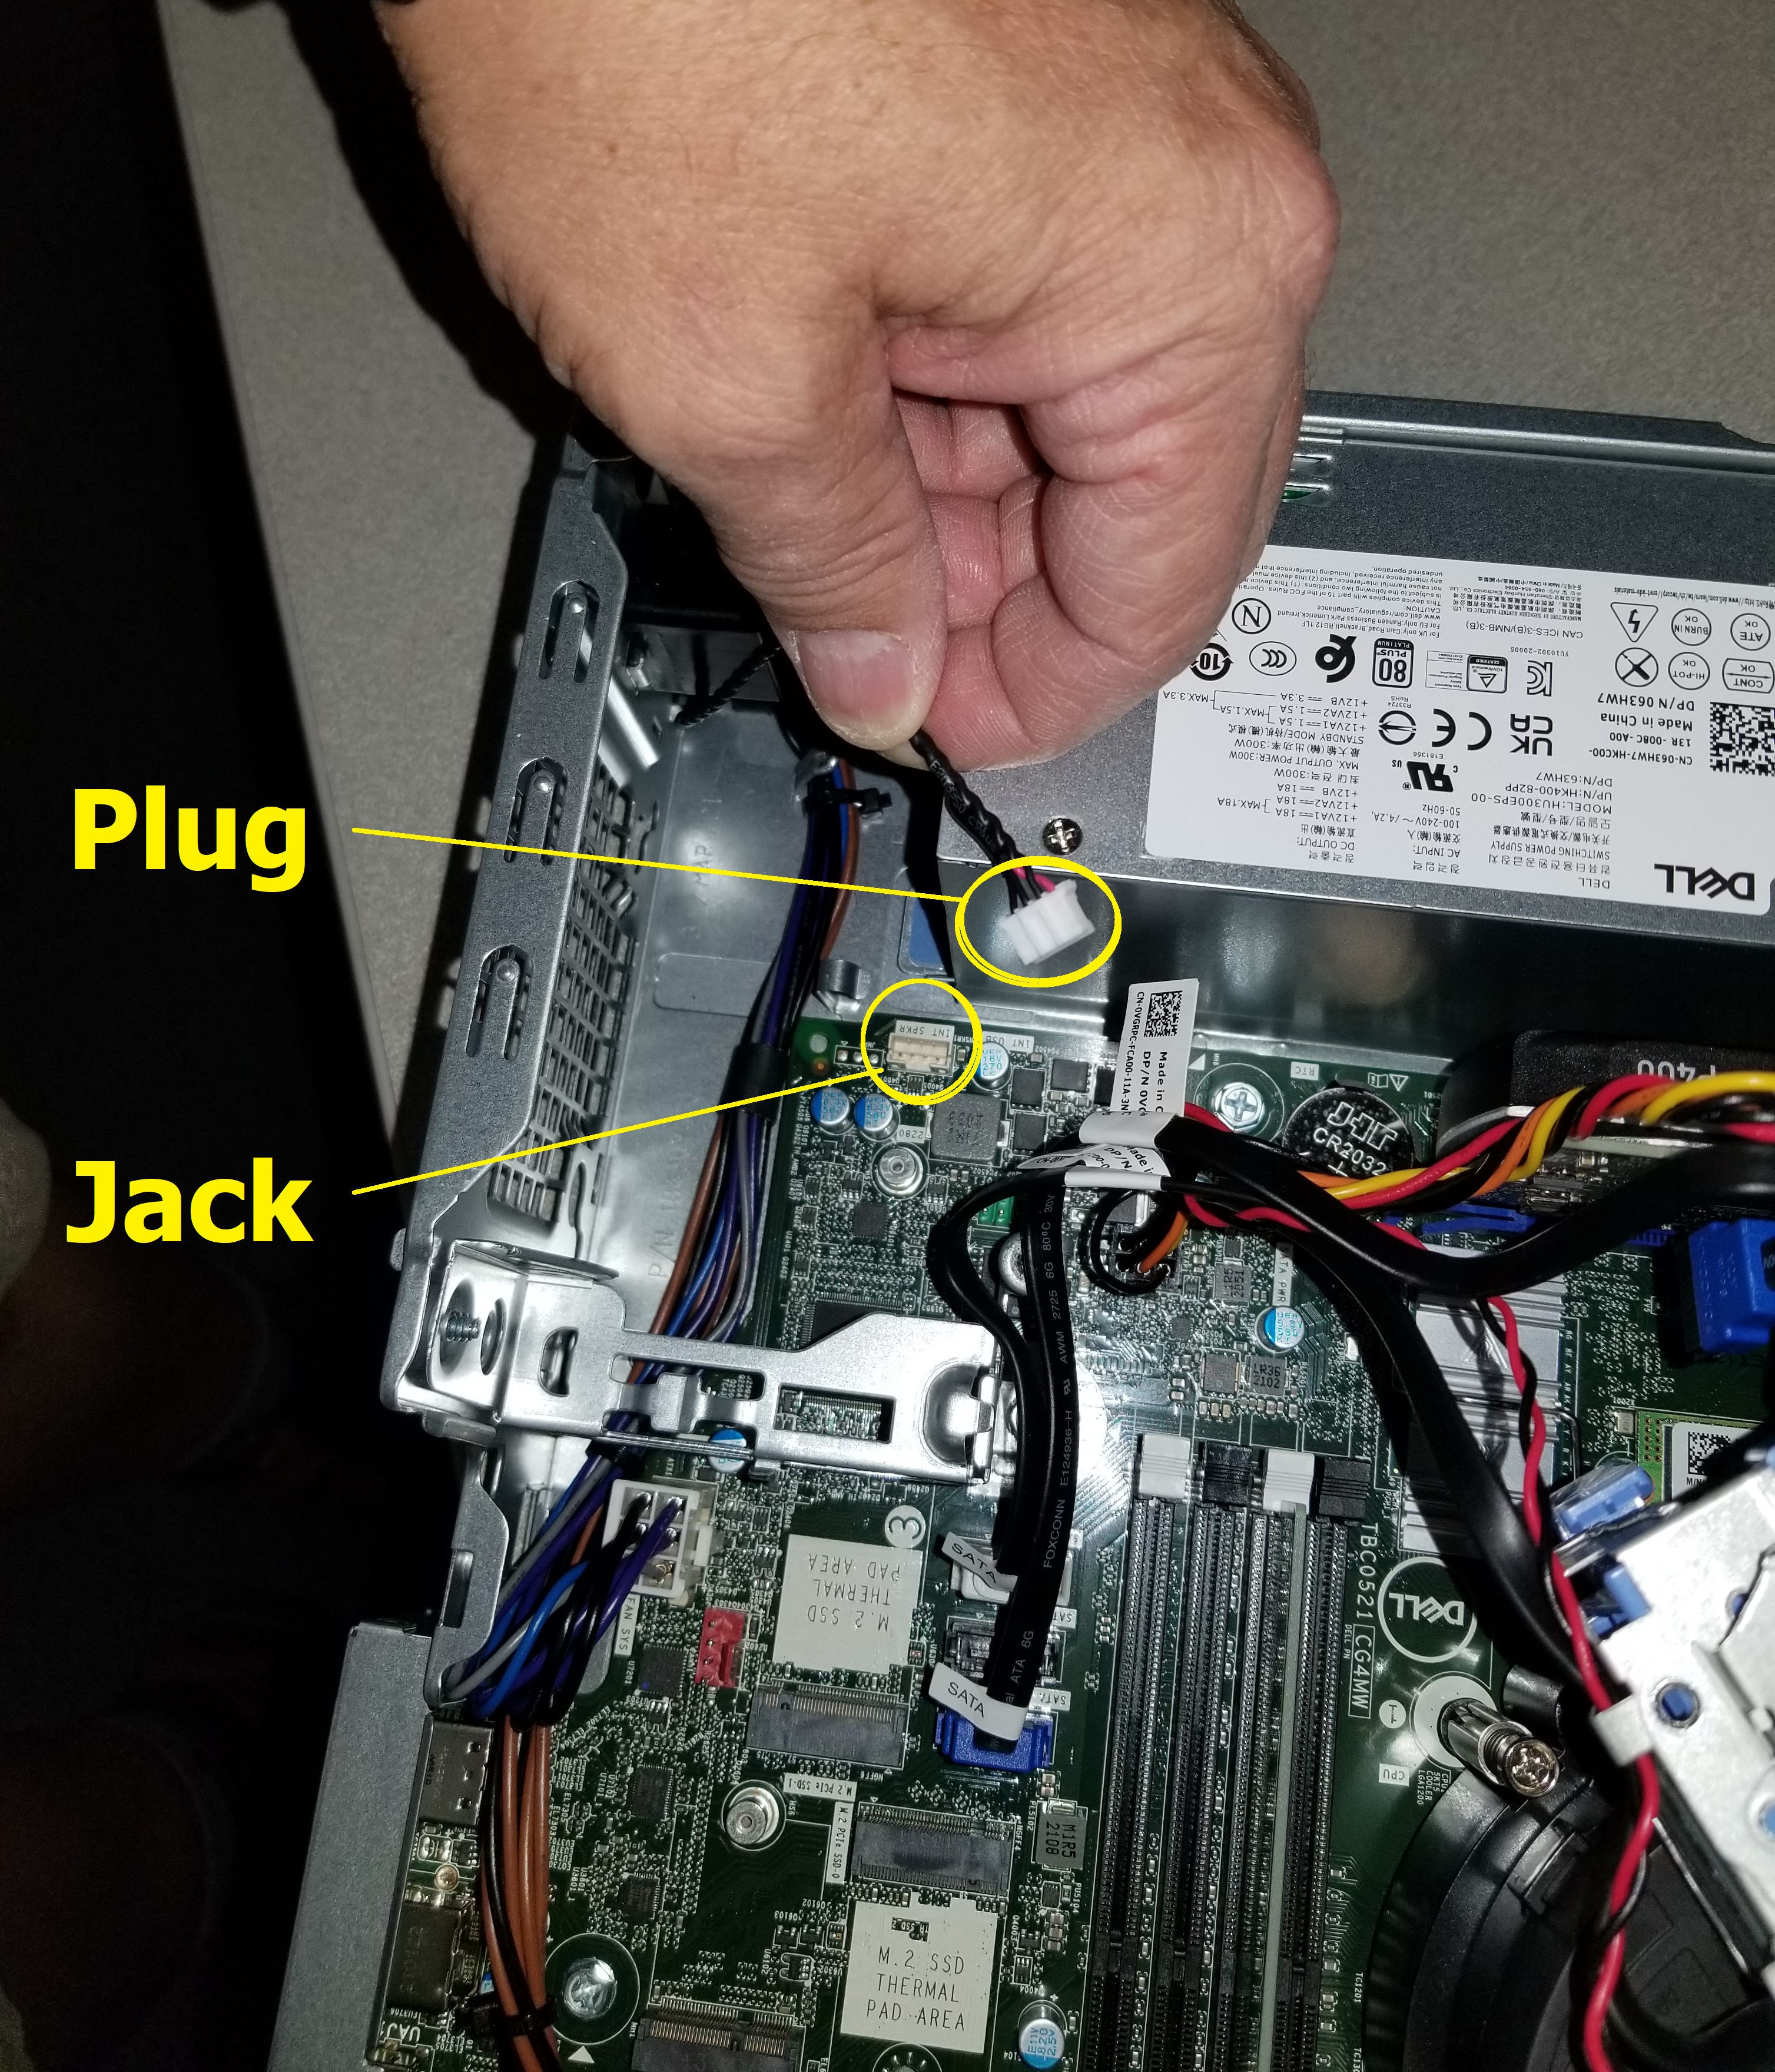
Plug in the speaker wire, making certain to line up the projection on the plug with the corresponding notch in the jack. Smaller fingers will have an easier time with this, or a pair of tweezers/needle-nose pliers can be used (with caution not to crush the plug or wires). Only light pressure should be needed to get the plug firmly seated.
Now to reassemble. Start by turning the drive cage back over and lining up the tabs with their corresponding notches in the frame, then lay the drive cage back into place. Be aware that the wires can get in the way of the latch, and will prevent the drive cage from being positioned properly to lock back into place.
Next, put the face back on. Note that there are 3 tabs on the bottom-inside edge of the face. These have to be lined up with their corresponding holes along the bottom-front of the frame, then the face piece levered up against the frame until the 3 locking tabs click back into place over the top of the frame.
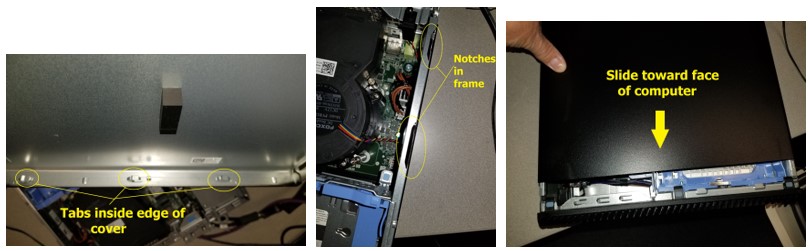
Time to close the case back up. Note that there are tabs along the back edge and both sides of the door, which must slide into place in order for it to fit properly, and that the lock tab on the door matches up with the same piece on the frame. The door must slide vertically back onto the computer, about 1/2 inch from the face piece, then slide toward the front, to latch into place. When all is lined up right, with moderate pressure the door will lock back into place as you slide it toward the face piece. There should be no gap between the door and face piece, when the door is locked in place.
Plug the machine back in and power it up. Sound should now function normally, but may need adjustment for volume.