...
Table of Contents
| Table of Contents |
|---|
Claim Returned Button
Click on Claim Returned. A claim returned can be used when a patron claims to have returned an item that is still checked out on their account.

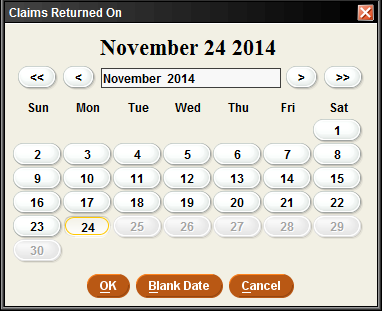
The Claims Returned On calendar will pop up. Click on the date they claimed to have returned the item and click OK. If the patron does not remember the date, click the Blank Date button.
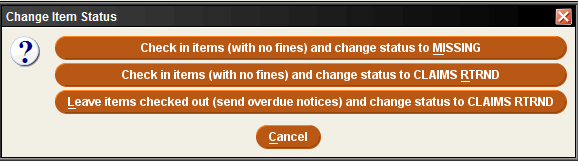
The Change Item Status pop-up box will appear. It is best to click the “Leave items checked out (send overdue notices) and change status to CLAIMS RTRND” button.
Messages
The following screen message will pop up, “The item was claimed returned.” The Status of the item will change to CLMS RETD.
...
The item will also have an INT. NOTE (internal note) stating when the book was marked Claims Returned, and date (unless you choose Blank Date on the calendar) and the patron number.
...
Returning the Item
If the item is found by a staff member or the patron...
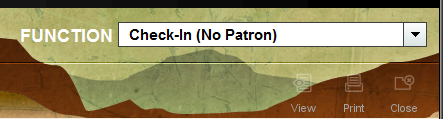
Check-in the item using the Check-In (No Patron) function.
Scan the barcode of the item.

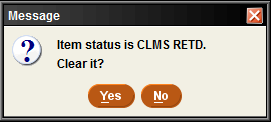
The following message will pop up, “Item status is CLMS RETD. Clear it?” Click Yes.
Clicking Yes, the following screen will display the Status as Claimed returned.


The item STATUS changed from CLMS RETD to – ON SHELF.

| Info |
|---|
The INT. NOTE will be gone from the item. |
Related Documentation
| Page Properties | ||||
|---|---|---|---|---|
| ||||
|